Oh, gardening. It’s something I’ve always had an interest in, but for some reason never really given a try. Last year, my husband and I decided to try a garden in our backyard. His parents warned us the soil was not suitable for growing, but we decided to give it a go anyway. It can’t hurt to try, and would only cost us the money for seeds. To sum up – they were right! What things did grow (spinach was about all that made it) were immediately eaten by some outdoor critters.
However, I didn’t want to give up on the idea of growing my own veggies! Last year I was part of a farmers market (selling my baked goods) and I really got into the idea of growing my own food. I still purchase some at the market, but I like the idea of being able to walk into my yard and pick fresh food that me, myself, and I cultivated!
So this year I decided to try out having a container garden. I put in a fair amount of research in terms of what types of veggies are suitable, what soil is best to buy, and how to grow from seeds. I also wanted to keep it as low cost as possible, especially if like last year, it wasn’t successful.
Luckily the low cost was easy enough. I headed to Home Depot for two five gallon buckets, and I also managed to find some of the big plastic tubs in clearance. Their lids were missing (hence the clearance) but that was perfect for me! And I got one big tub with rope handles from my mum since the bottom was cracked. Not good for storage, perfect for a container garden. I recruited my Grampa and his massive drill selection to add drainage holes in my containers and I was good to go! The total cost of the containers was less than $15. I can handle that!
The soil was my big spend. But, it’s necessary and if you preserve it well, it’ll last you for a couple years. I use Miracle-Gro Moisture Control soil in all my containers.It’s recommended for container gardens, and has worked great for me so far! I used it for both my big outdoor containers, and my teeny seed planters for when I started seedlings.
Scooping dirt, tamping it, and placing seeds with my little miss!
Since I was planting everything from seed, I had to get transplants growing early for my broccoli and tomatoes. Using the Farmer’s Almanac website to get a rough idea of when the last frost would be, I planned out when to start my seeds so they’d have 8 weeks of growing time before transplanting to the big containers. Our apartment has a big sunporch in the front which was a perfect place for the seedlings to start. Plenty of sun, and safe from the elements. Which turned out to be necessary thanks to a freak snowstorm in MID MAY! But my little sprouts were safe and sound, and grew nice and healthy.
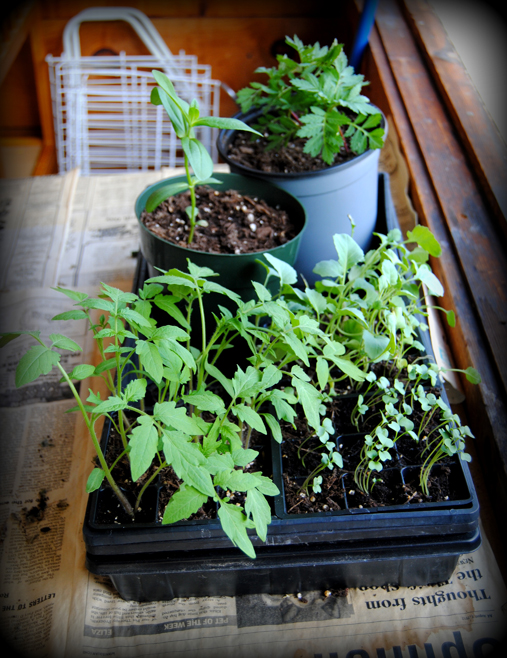
Broccoli towards the back, tomatoes up front.
As you can see, I went a little overboard with my seedlings. I was afraid some wouldn’t germinate so I planted TONS. Luckily, I passed some tomatoes and broccoli on to my mum and grandmother so they didn’t go to waste.
This was about one week before transplant day. The two pots furthest back are Marigolds and Zinnias, grown by request from my daughter.
The first weekend of June rolled around and I transplanted everything into the big containers. Originally, this was supposed to be just me and my daughter’s project (my hubby is happy to EAT freshly grown veggies but the gardening aspect just isn’t his cup of tea) but three days prior to planting day, I broke my ankle. So the hubs kicked in some manual labor (hauling five 70lb bags of soil for me!!) and we got it planted. Since I wasn’t planning on having a blog yet, I didn’t take any photos on transplant day. Shucks. But, I have PLENTY of photos for Part 2 of this post – the current state of my container garden in it’s new outdoor location. So stay tuned!
Do any of you have any form of a garden? If so what do you grow?


